A public channel is an open access channel that allows users to access the channel content without having to login or without being invited to the channel as a user.
Steps for creating a Public Channel:
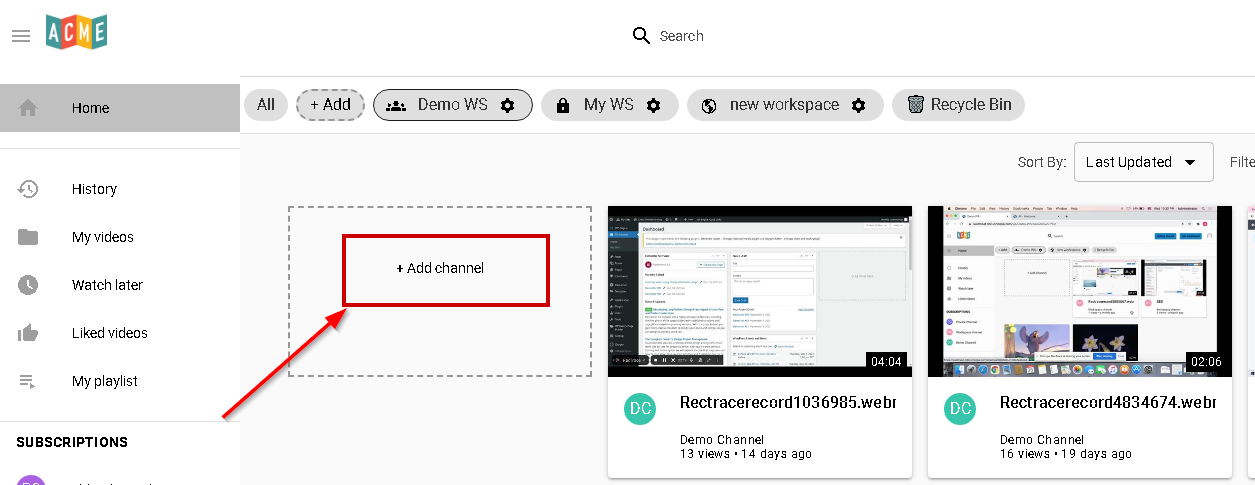
- Navigate to the Workspace under which you would like to add the new Channel.
- Click on the + Add Channel option.

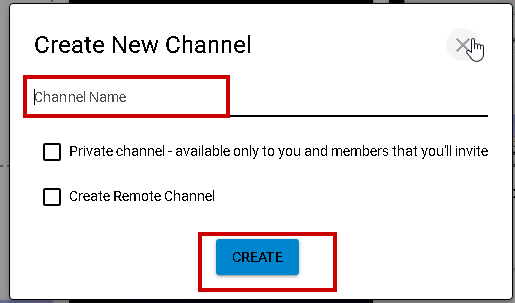
- Enter the Channel Name and then click on the Create button. Leave the Private Channel and Remote Channel option unchecked to create a public channel. Selecting the Private channel option will inherit the channel privacy settings from the workspace and Remote channel is used only when you are looking to create a channel for syndicating content.

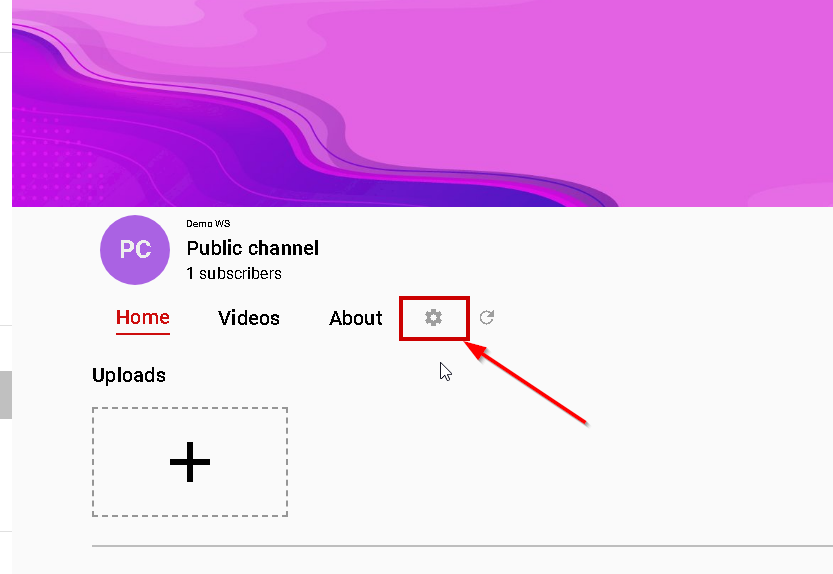
- Once the Channel is created, click on the Settings icon.

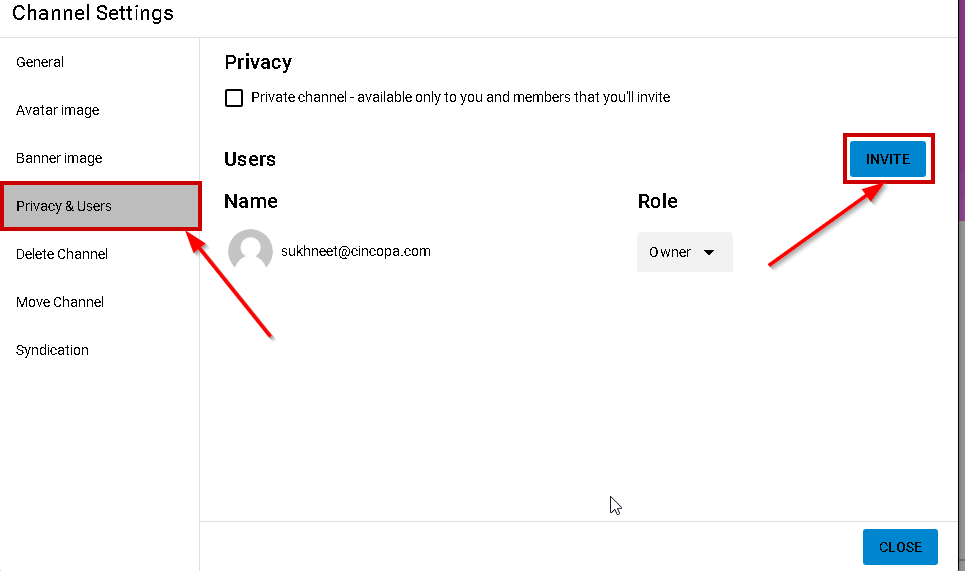
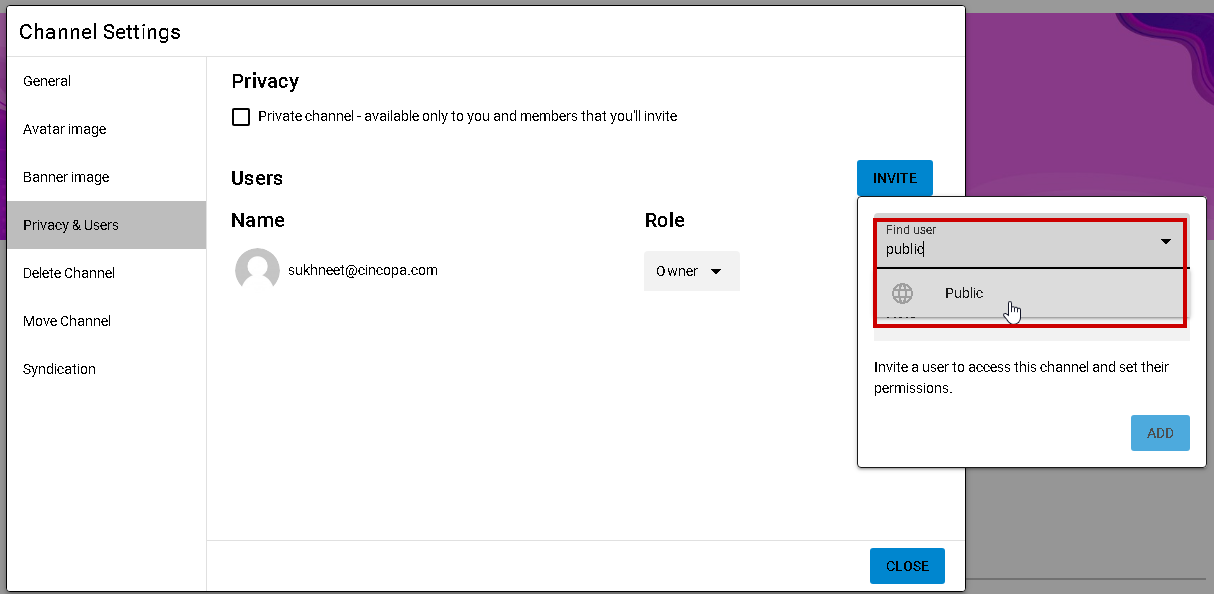
- Click on the Privacy & Users tab and then click on the Invite button.

- Under Find User field, type and select Public.

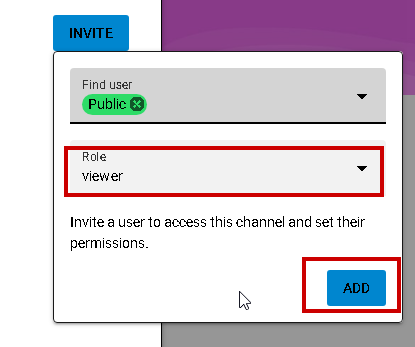
- Under Role, select View and click on the Add button.

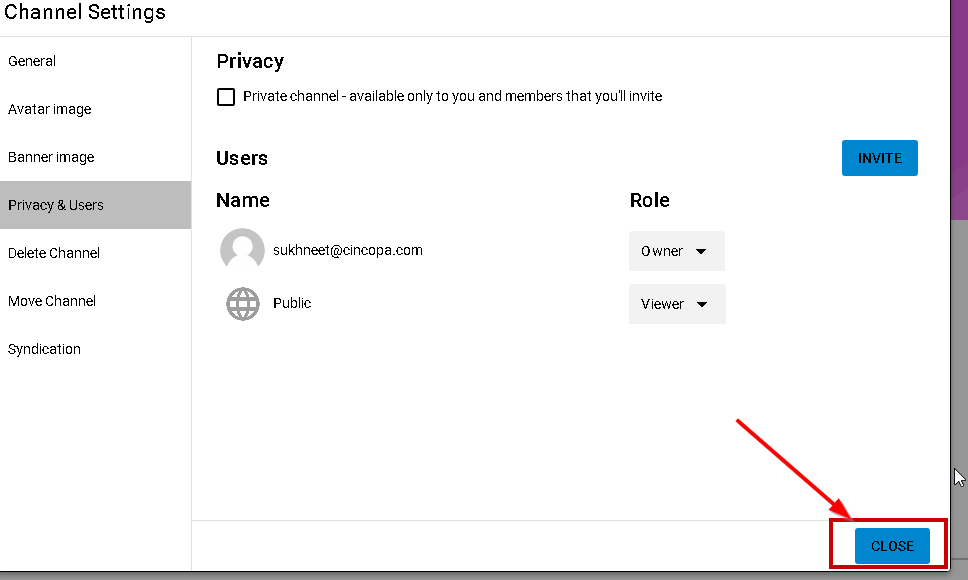
- Click on the Close button to close the Channel settings. The channel is now setup and available to the public.


